Your first workspace
A workspace is one project: its folder, its agent, its own login and history. The short tour at first launch ends by making one.
The tour
The first time you open Termlux, a four-step tour introduces it: Welcome, Workspaces, Claude and Create.
- Use and to move between steps, to go on, and to skip.
- Skip setup leaves the tour; you can make workspaces later with .
The Claude step shows the four shortcuts worth knowing from the start:
| Keys | What it does |
|---|---|
| Run anything: search workspaces, sessions, hosts and commands | |
| New terminal | |
| Switch a session between its terminal and Claude's chat | |
| All shortcuts |
Create the workspace
The last step asks for four things:
1. Project folder: the folder you'll work in, such as
~/code/my-project. Type a path or click Choose…. It's optional: left blank, sessions start in your home folder.2. Workspace name: taken from the folder's name if you leave it, or anything you like.
3. Agent: Claude Code, Codex, Cursor, Aider or Plain shell. Claude Code is chosen for you.
4. Color: the workspace's dot in tabs and lists.
Below them, Send crash reports is off unless you tick it. See what a report contains.
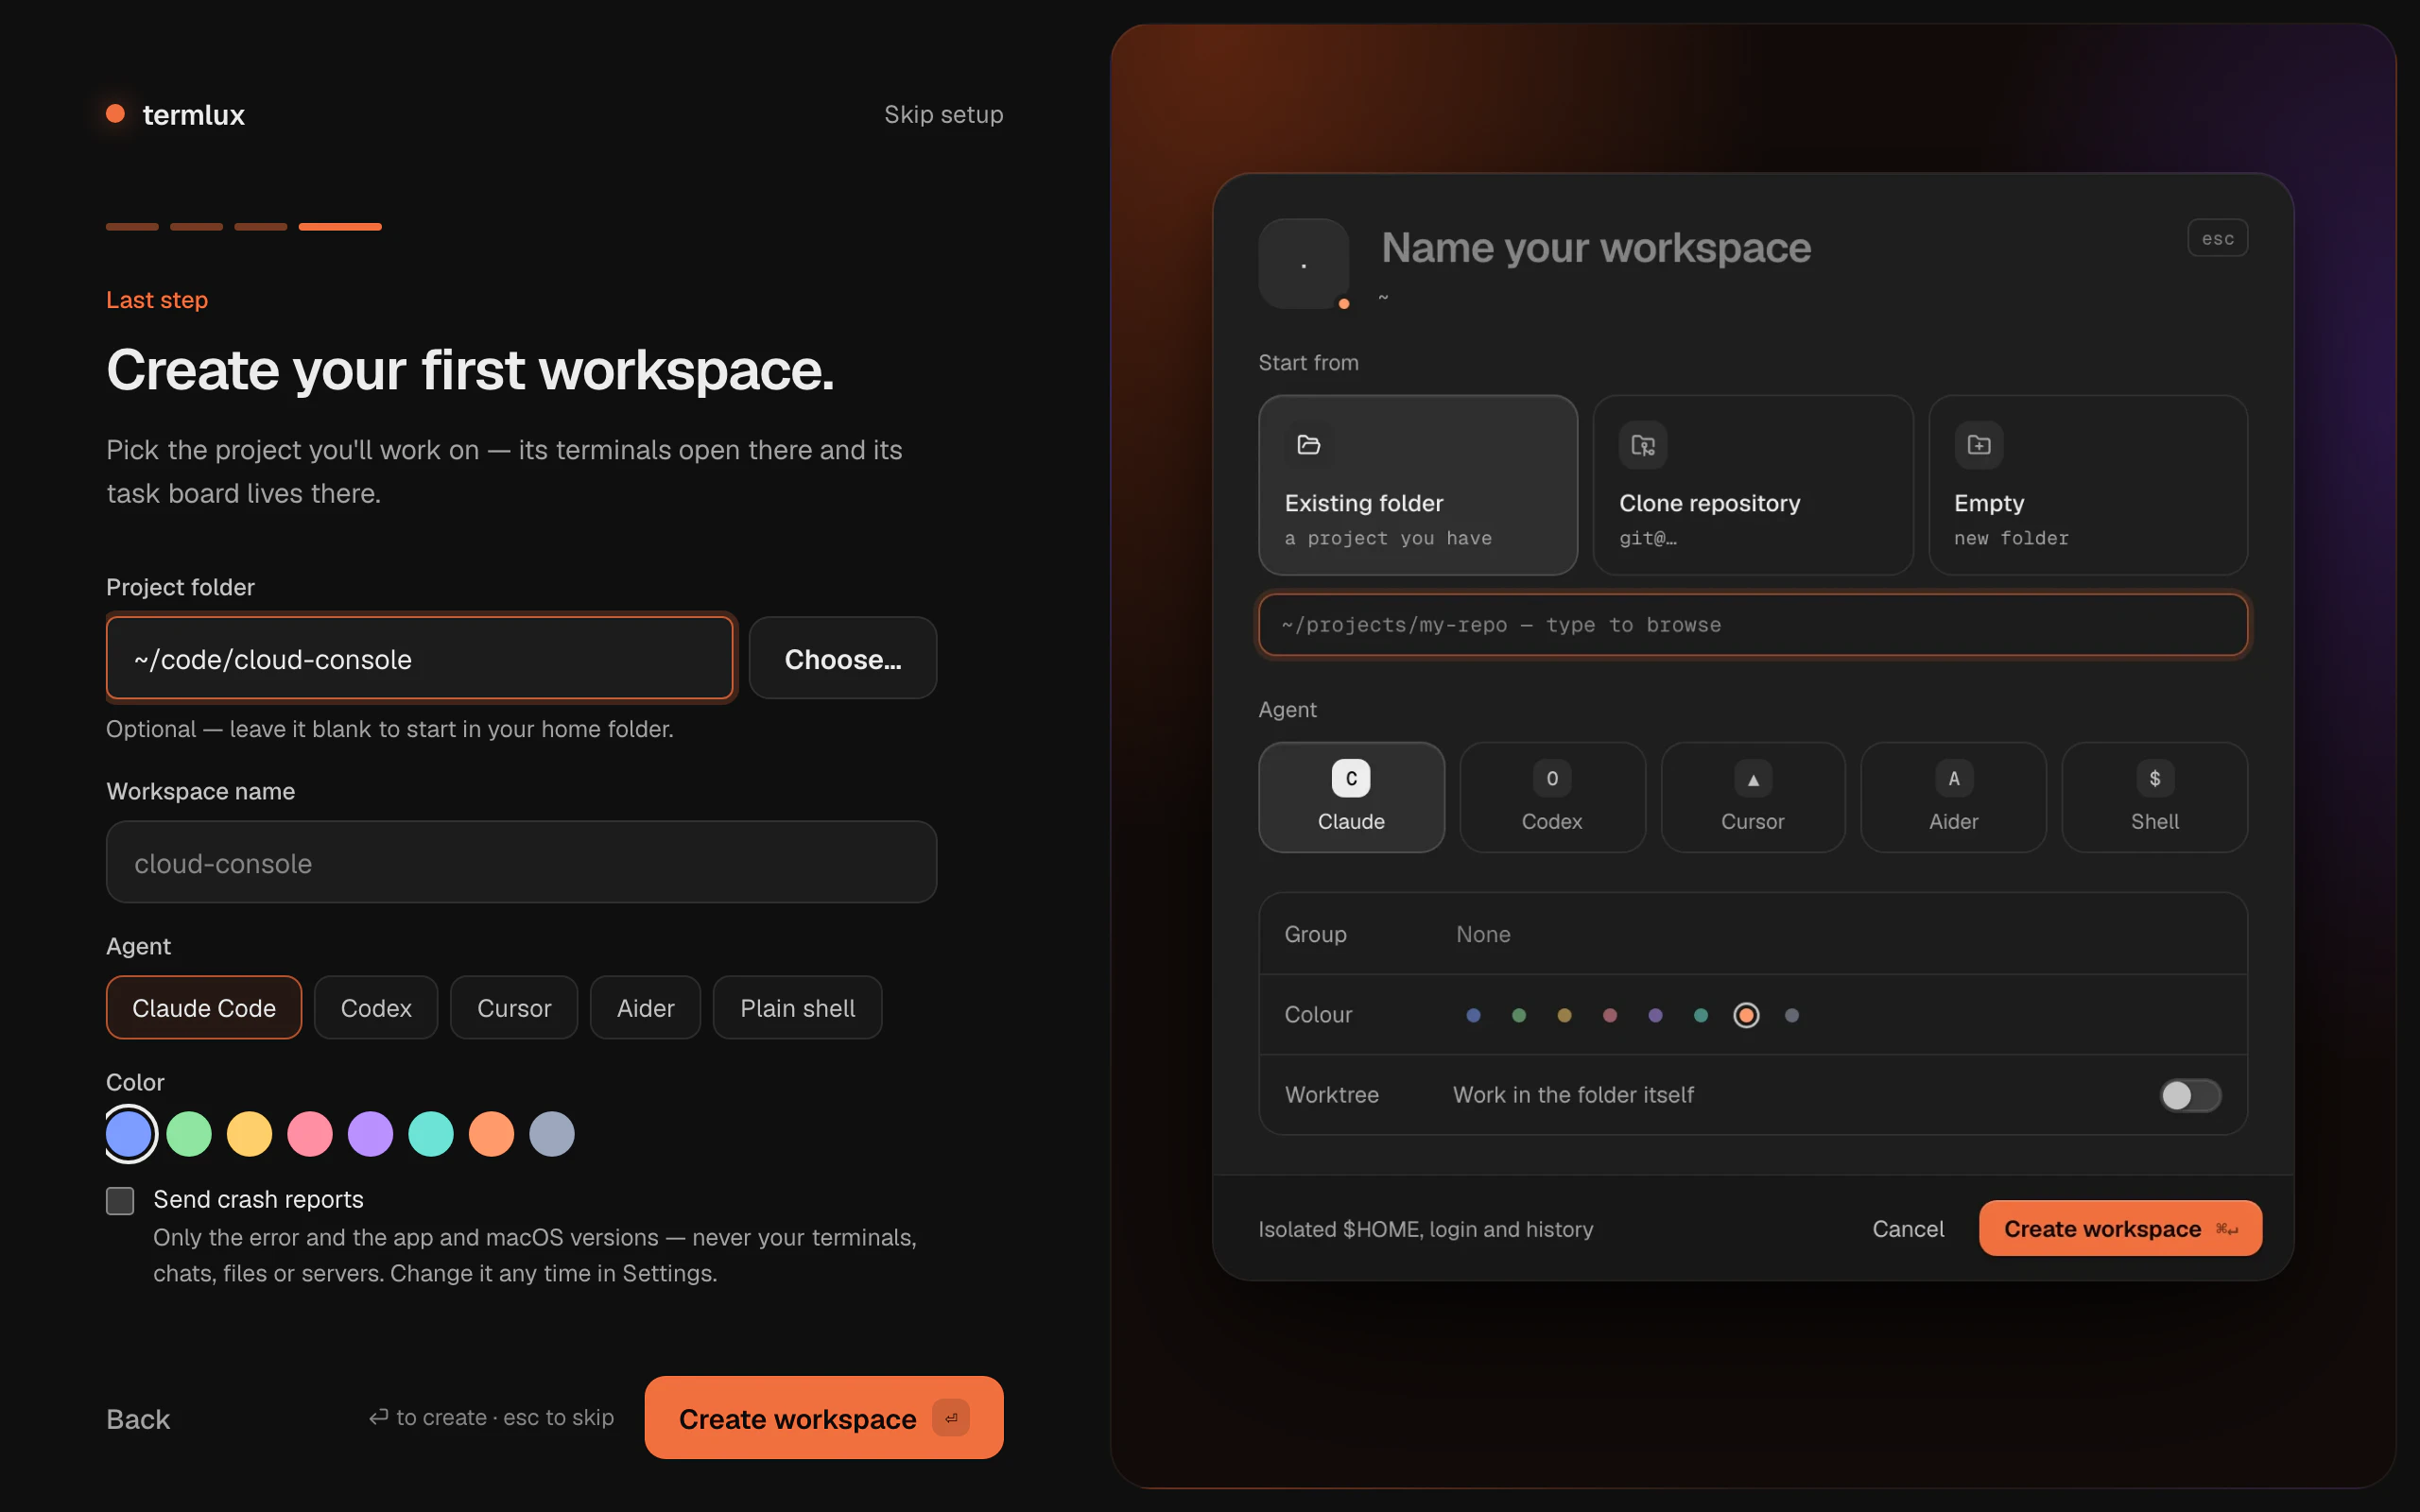
Click Create workspace.
What you have now
Your workspace opens, empty, with two ways to start:
- New Claude chat opens Claude in the project folder, as a chat. The first time, it asks you to log in to Claude for this workspace.
- New terminal () opens your usual shell in the project folder. Type
claudethere and the session becomes the chat; exit Claude and you're back in the terminal.
Every workspace is your Mac as you've set it up: your home folder, your ~/.zshrc and ~/.zprofile, your tools and their logins. What a workspace keeps of its own is explained in Workspaces.
Next
- Workspaces: make more, group them, change their settings.
- Claude as a chat: what everything in the chat does.
- The task board: the list of bugs and to-dos you and Claude share.